How to make a Neolithic Pinch Pot

Pottery was first used in Britain about 6,000 years ago, around the same time as farming began. Early versions of pottery were simply functional, allowing people to heat liquids over a fire. Later in the Neolithic period, people began decorating pottery with geometric patterns like lines, zigzags and dots.
SUPPLIES:
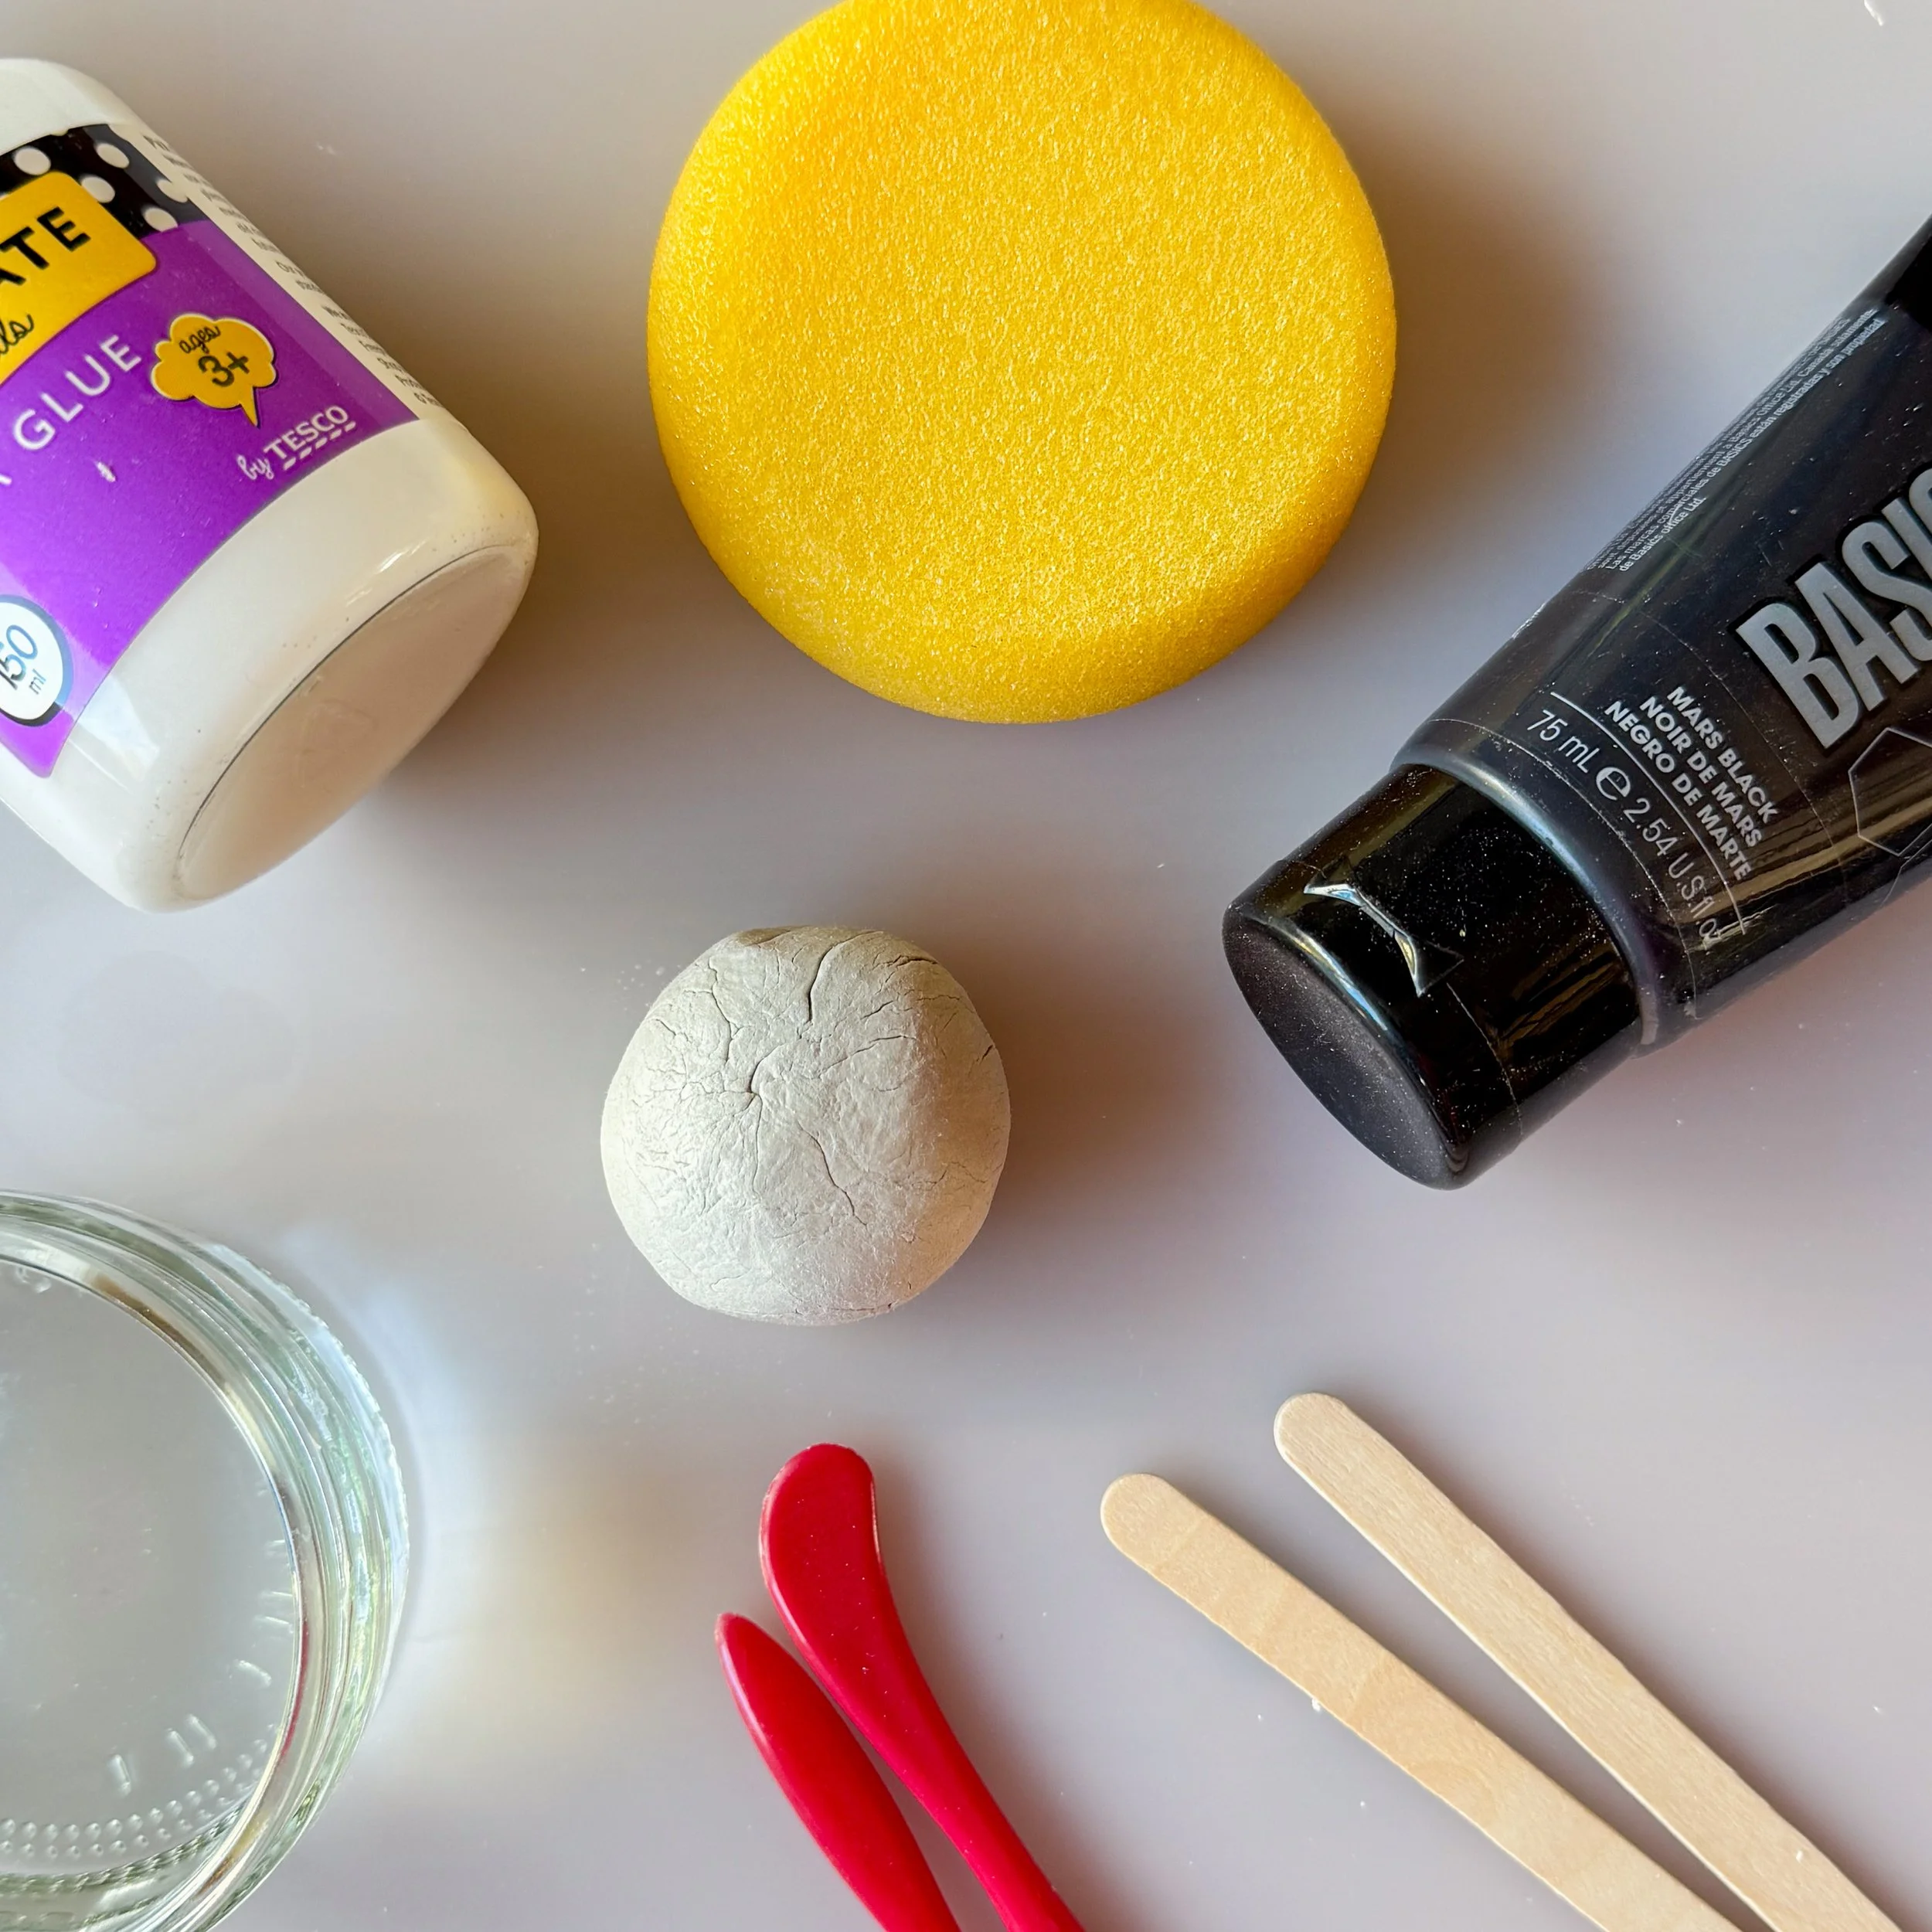
Air dry clay
Newspaper or plastic sheets
Sponge (optional)
Containers for mixing
Carving tool
Water
Glue
Paintbrush

WHAT TO DO:
Look at images of Neolithic Grooved Ware and sketch out your design on a piece of paper.
Cover your workspace with newspaper or a plastic sheet.
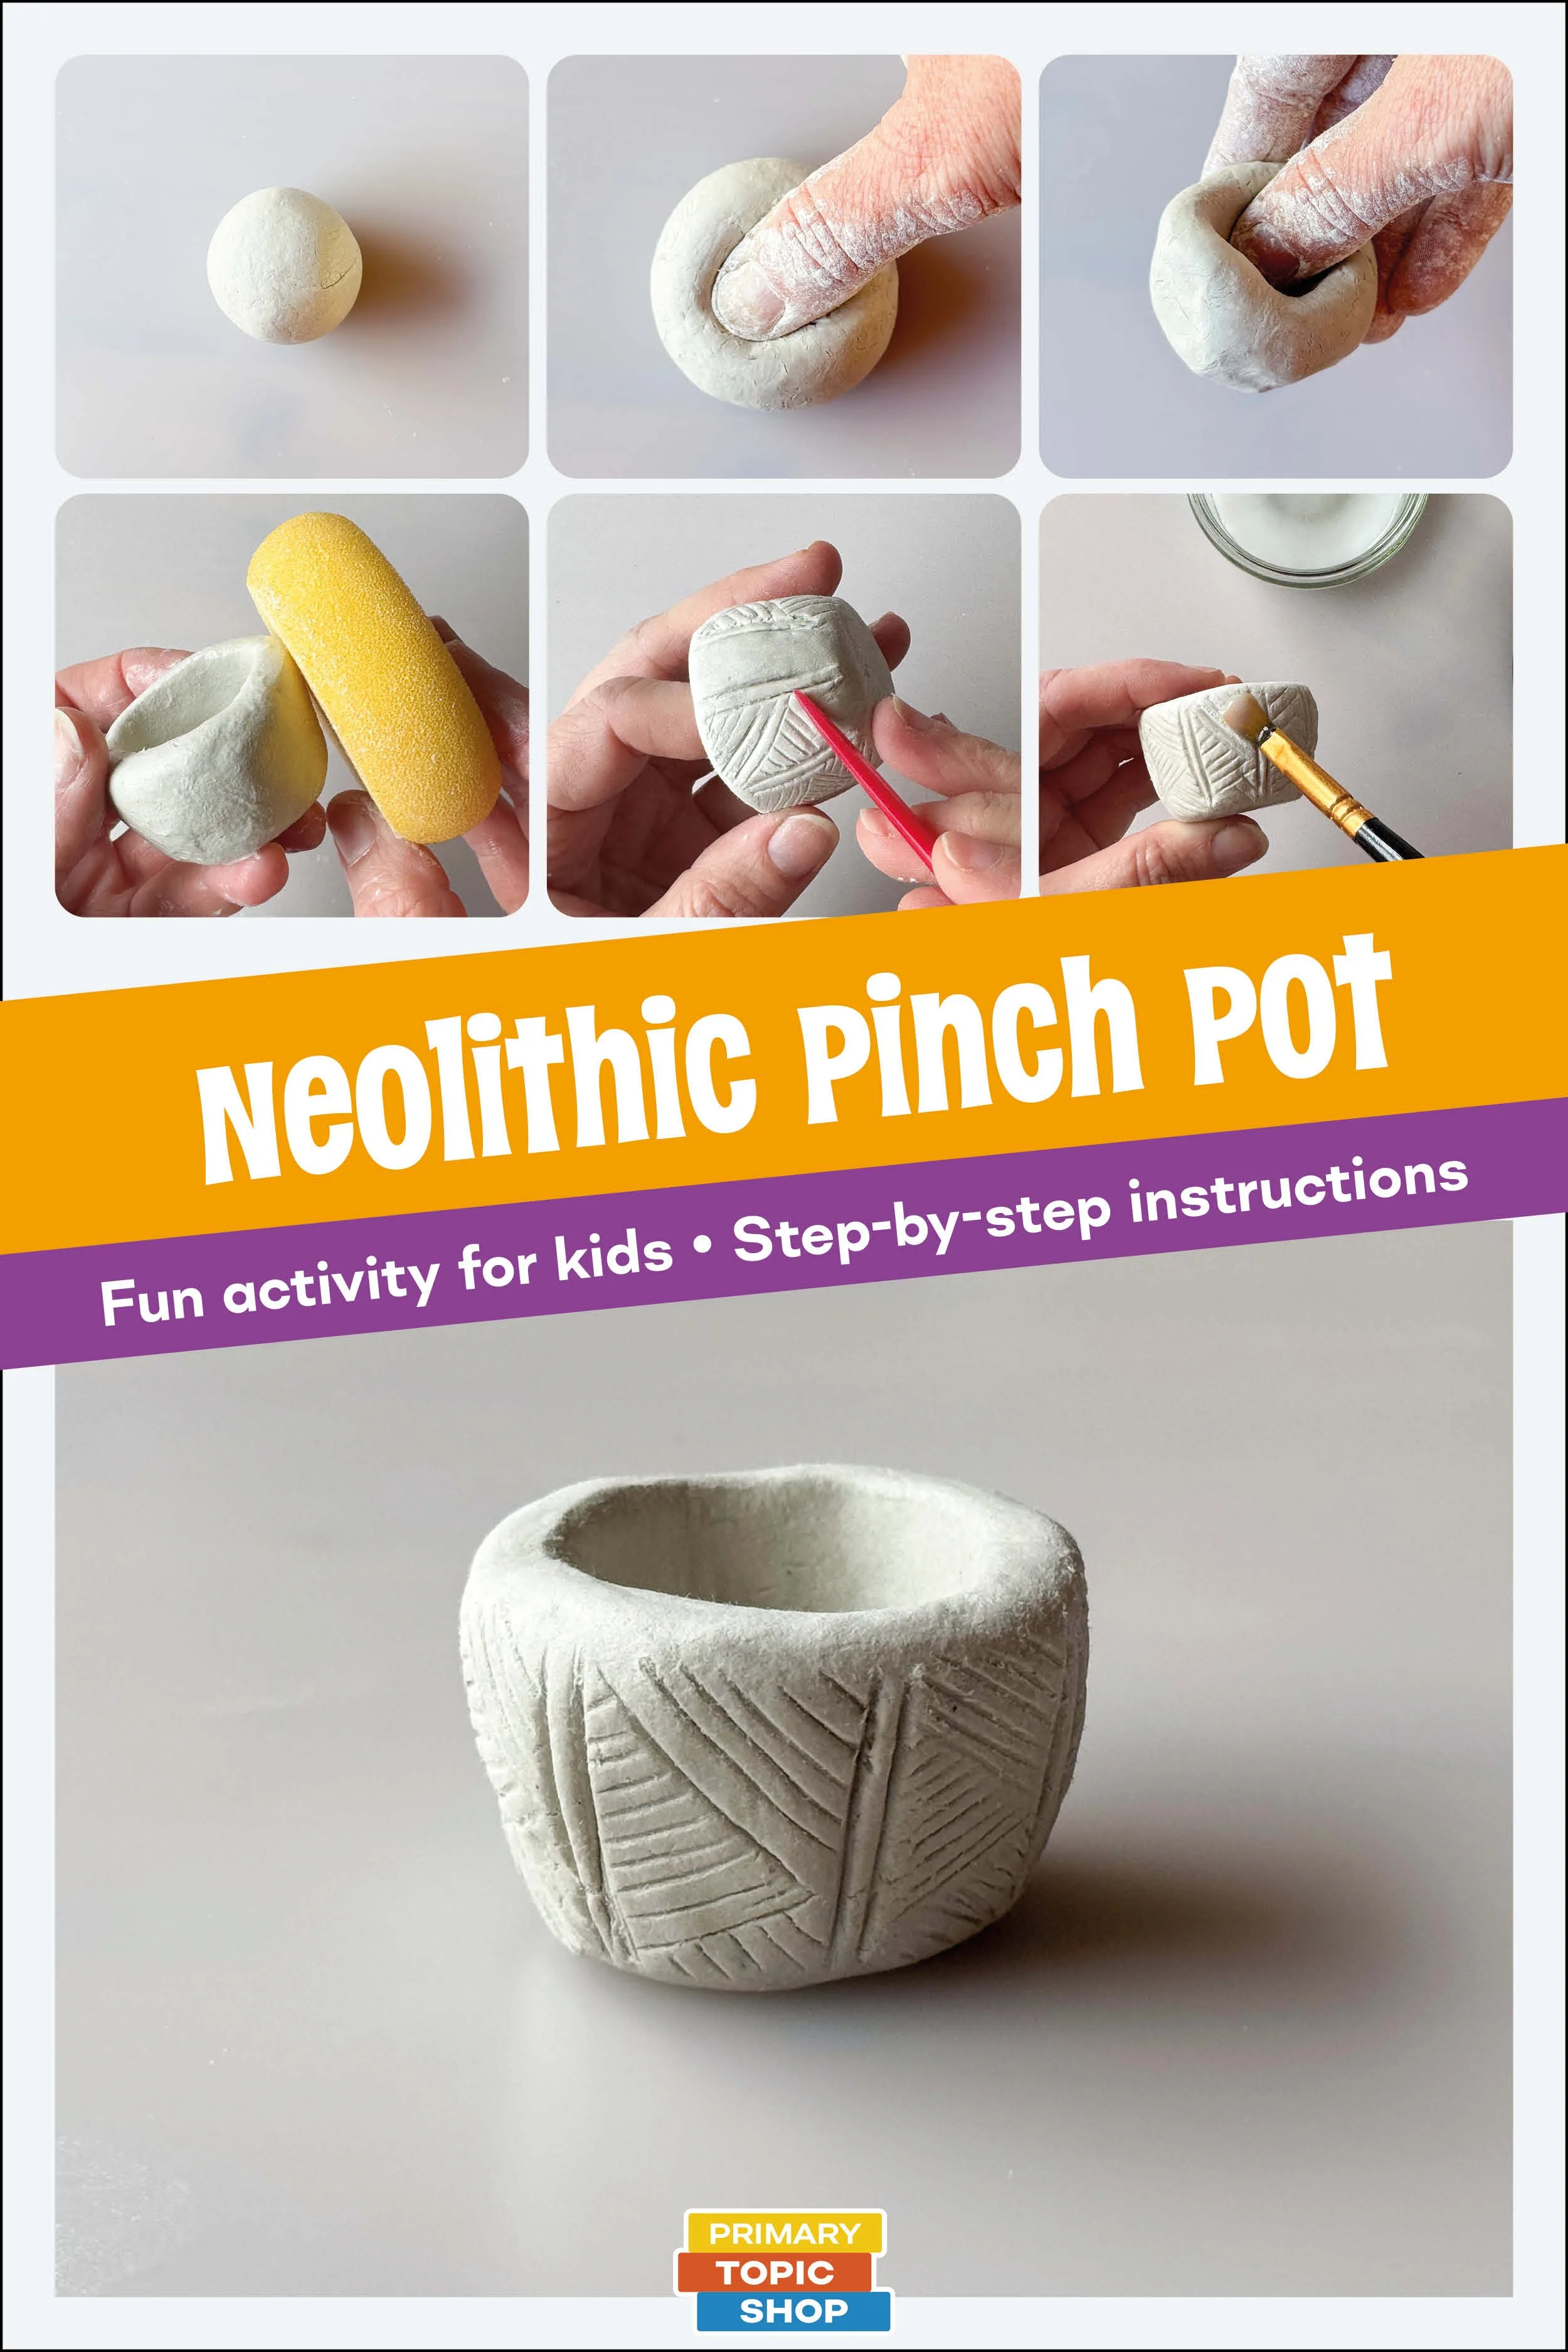
Knead a piece of clay and roll it into a ball.
Push your thumb into the middle of the ball, but don't push it all the way through - leave some clay at the bottom for your base.
Turn the clay in your hand as you pinch the sides of the ball with your fingers taking care to pinch more where the sides of the pot are thicker until you have the shape you want. Grooved Ware Pottery usually had a flat bottom and slightly flared sides.
Use a damp sponge to smooth out the sides (optional).
Let your clay pot air dry until it is leather-hard. That means the clay is firm, but not completely hard - a bit like leather!
Using your sketch for reference, carve your designs into the clay with clay tools, a pencil, or the handle of a small paintbrush. If the clay is hard to carve, try softening the surface with a damp sponge.
Let your carved pot dry completely.
Optional: If you like, you can paint your pot.
Mix one part glue with one part water. When your pot is dry, paint a thin layer of the glue solution on your pot to protect it.