
How to make a Fresco with Plaster of Paris
During the Classical and Hellenistic Periods, the interior walls of palaces, public buildings, tombs and villas were decorated with a type of painting called a fresco. Fresco is the art of placing pigment on a freshly plastered wall before the plaster has set. As the plaster dried, the pigments became embedded into the surface, creating a durable piece of art. These frescoes show scenes of Greek life, sports, mythology and landscapes, telling us a bit about how the Ancient Greeks lived.
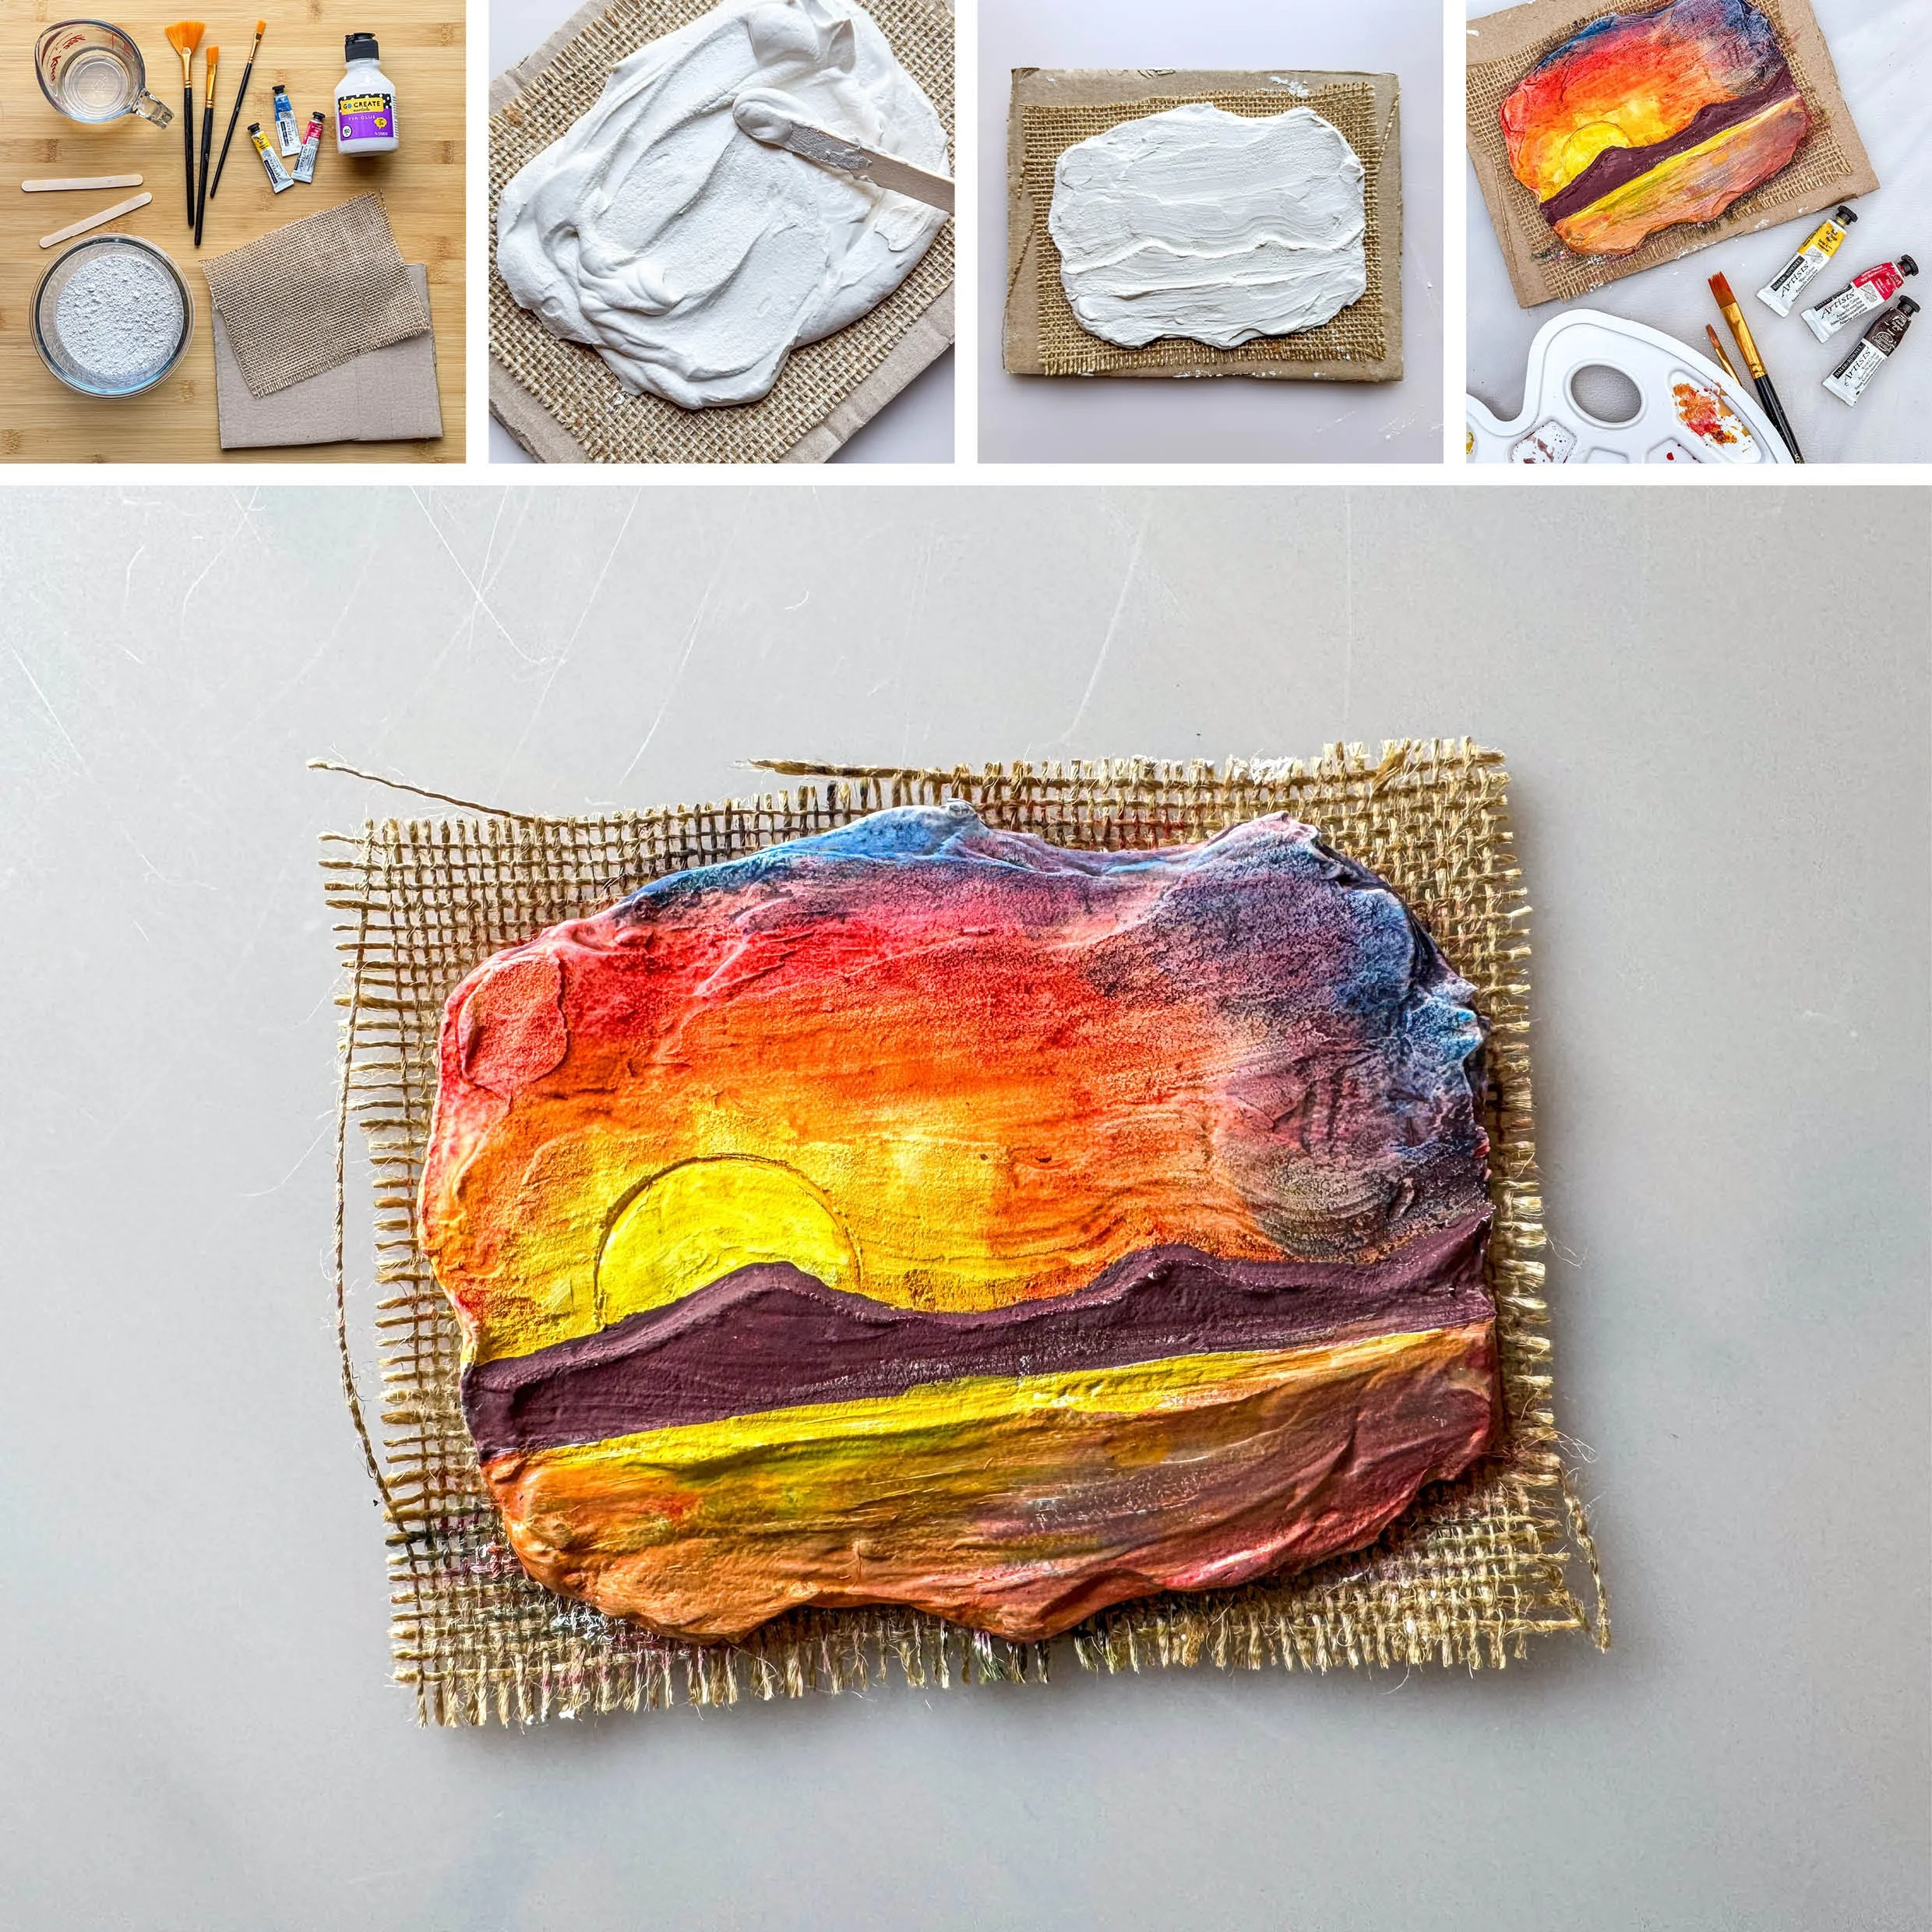
Supplies
Plaster of Paris (about 2/3 cup per fresco)
Water (about 1/3 cup per fresco)
Mixing bowls and stirring sticks
Burlap fabric
Cardboard or wooden boards (for the base)
Watercolour paint supplies (paints, a cup of water for rinsing brushes, paintbrushes, paper towel)
Newspaper (to protect the workspace)
Glue (optional)
WHAT TO DO:
Choose your design and practice drawing it on paper until you are happy with it. Try using colours and designs inspired by ancient Greek art. Once you make the design on the plaster, it will be very difficult to change it.
Lay down newspaper to protect the workspace. Lay a piece of burlap fabric over a cardboard or wooden board to serve as the base for the fresco.
Mix the plaster of Paris with water in a mixing bowl according to the instructions on the package (usually two parts plaster to one part water - we mixed 2/3 cups of plaster to 1/3 cup of water for a 4in X 6in fresco about 1/2" thick). Stir well until the mixture is smooth and lump-free.
Apply the plaster mixture onto the burlap fabric evenly using stirring sticks or paintbrushes. You will need to work quickly before the plaster starts to harden.
Once the plaster is applied, you can use your fingers or tools to create textures or designs on the surface. You can also embed small objects into the plaster to add detail.
Allow the plaster to set until it keeps its shape but it is still pliable. This may take a few minutes or several hours depending on the thickness of the plaster layer. (Our 1/2" fresco only took about two minutes to set.)
Once the plaster is dry, spray the surface with water or dampen with a sponge and paint the frescoes using watercolour paints. Be sure to rinse your brush often.
After the paint has dried, add any final details or embellishments to your fresco.
Optional (To give your fresco an aged look): Mix a tiny bit of brown paint with water. Crack the plaster and paint over the image with the tinted water.
Mix one part water to one part white glue (or use Mod Podge) and paint this mixture over your fresco in a thin layer to protect it and give it a glossy finish.